Home Assistant is an extremely versatile open-source platform designed to integrate and automate connected devices in a variety of contexts, including professional lighting. What sets Home Assistant apart from other home automation solutions is, above all, its independence from major digital players such as Google, Amazon and Apple.
Unlike the home automation systems of these companies, Home Assistant does not depend on any external cloud: it runs entirely on-premises, which brings advantages in terms of security, responsiveness and data control.
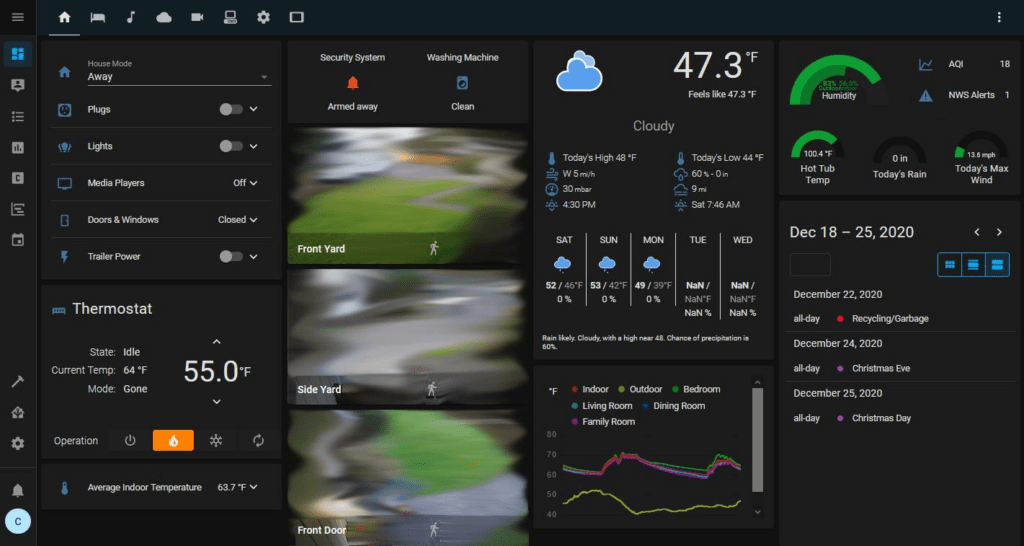
The Advantages of Home Assistant
- Data Independence and Security
With Home Assistant, all data remains in your local network. This reduces the risk of hacking or data leaks, which is crucial for privacy-conscious professionals. Plus, you don’t need to be connected to the internet for your automations to work, meaning lights, sensors, and other devices are fully operational even if the internet goes down. - Full Control and Customization
Because Home Assistant is independent of Google, Amazon, and Apple, you have complete control over your data and devices. No forced updates or third-party decisions interfere with your configurations. Users can change every setting, add specific integrations, and create automations that meet the exact needs of their business environment. - Open Source: Continuous Evolution and Adaptability
As an open-source project, Home Assistant is constantly improved by a global community of passionate developers and users. This ensures rapid evolution with new features, bug fixes, and security updates. The flexibility of open-source code allows advanced users to adapt Home Assistant to their specific needs, integrate new devices or develop complex automations, without waiting for official updates. - Extensible and Innovative Ecosystem
Home Assistant contributors enrich the platform by proposing new integrations and innovations. This means that your installation can evolve along with your needs. Whether you want to add compatible devices, such as Zigbee bulbs or advanced sensors, or create more complex automations, you benefit from a solution that is constantly updated and enriched, at no additional cost.
Do not hesitate to consult our article on the Zigbee protocol compared to the Thread protocol here.
These strengths make Home Assistant a strategic choice for lighting professionals, offering them independence, security and scalability.
This guide covers the main steps to set up Home Assistant, with a focus on customization and security, as well as tips for maximizing the efficiency of your connected lighting system.
Installation on Raspberry Pi
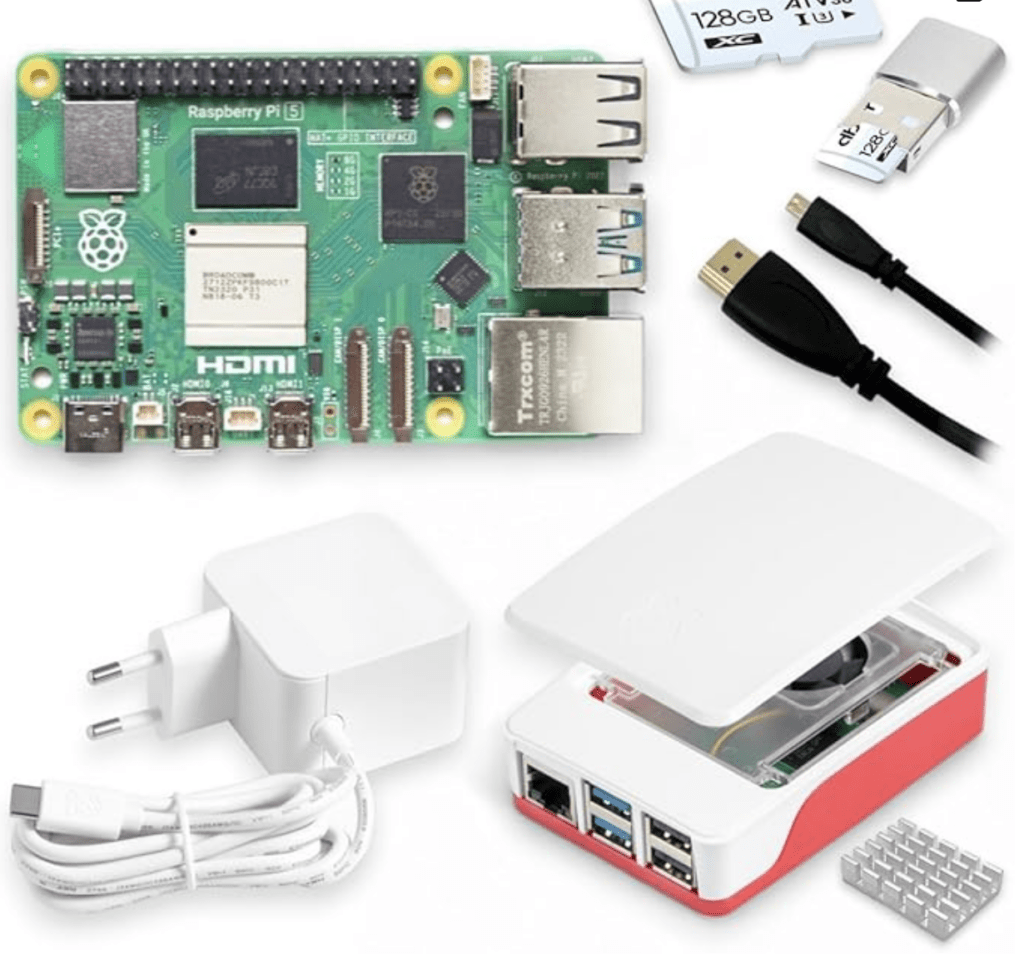
To get started with Home Assistant, installation on a Raspberry Pi is recommended. The Raspberry Pi is a credit card-sized single-board nanocomputer, ideal for home automation projects like Home Assistant.
It can be included in a case with a fan, power supply, Micro SD card reader (example here). The Raspberry Pi must be connected to your Internet box via Ethernet cable. It can also be connected to a screen via HDMI cable, and accommodate a keyboard thanks to one of its USB ports.
But it is advisable to manage it remotely, by accessing its operating system (not pre-installed) in SSH command via a computer connected to the same network.
Installation procedure
- Download and install Raspberry Pi Imager on your computer (https://www.home-assistant.io/installation/raspberrypi/)
- Open Raspberry Pi Imager and select your Raspberry Pi model.
- In the “Choose OS” menu, select “Other specific-purpose OS” > “Home assistant and home automation” > “Home Assistant” (it is possible, for other uses, to install more generic operating systems, such as Debian for example)
- Choose the version of Home Assistant OS corresponding to your Raspberry Pi (3, 4 or 5)
- Select your SD card as your storage medium.
- Click “Write” to flash the image to the SD card
Once the installation is complete, insert the SD card into your Raspberry Pi, connect it to your network via Ethernet and plug in the power supply
First access to Home Assistant
After booting the Raspberry Pi, access the Home Assistant web interface:
- Open a web browser on your computer.
- Enter the address:
homeassistant.local:8123
If this address doesn’t work, use your Raspberry Pi’s IP address followed by :8123. For example: http://192.168.1.100:8123
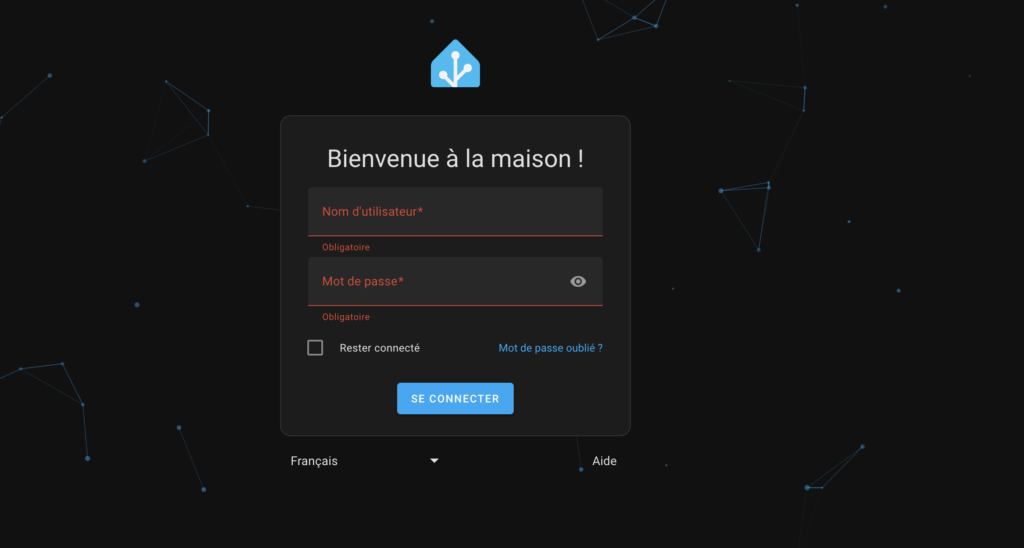
When you first start Home Assistant, the welcome wizard will prompt you to create an account. This account has full administrative rights, allowing you to configure the system, integrate devices, and more.
An administrator account is obviously essential to set up the solution, but for day-to-day use, it is often better to use a user account with more limited rights, especially if you plan to access Home Assistant from outside.
Device discovery
Once connected, Home Assistant will automatically scan your network for compatible devices, including your lighting fixtures.
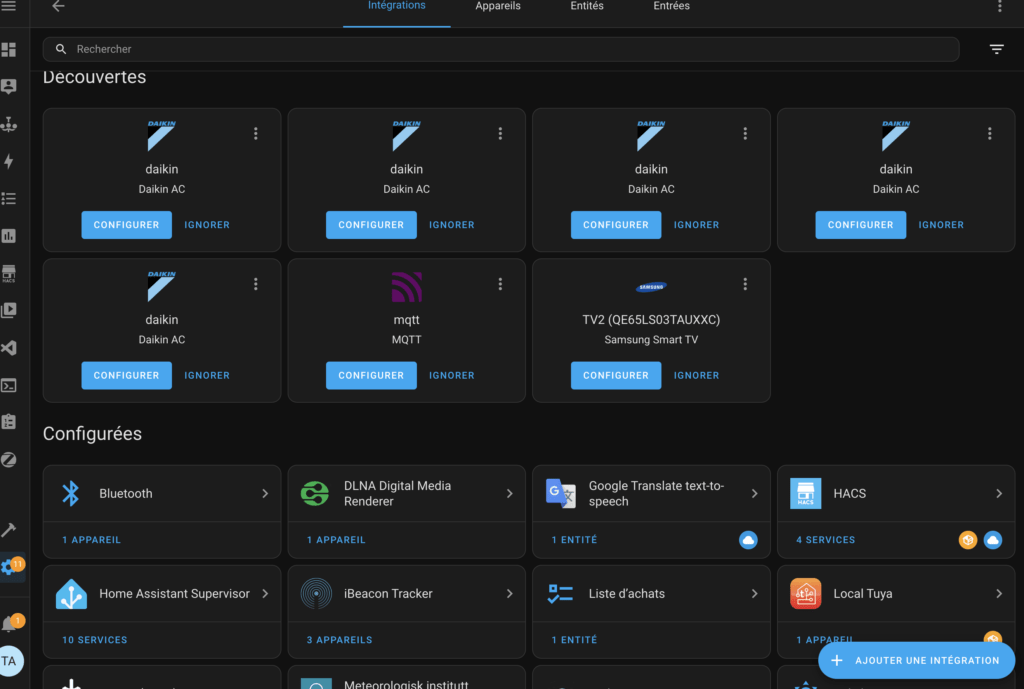
Home Assistant is compatible with a wide range of lighting protocols and brands. You can easily integrate any type of lighting compatible with Zigbee, Matter / Threads, but also 2.4 Ghz via Tuya (a little complex).
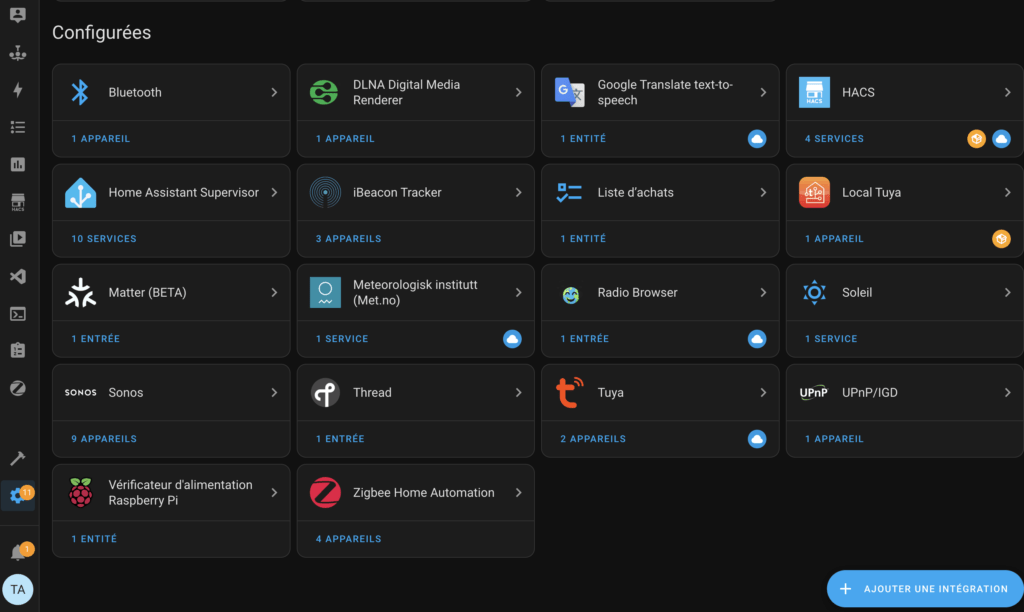
To add these devices, go to Configuration > Integrations and search for the corresponding brand or protocol.
Here is a list of the main types of connected devices compatible with Home Assistant (apart from lighting), accompanied by some examples:
Connected Plugs and Relays
- Smart Plugs: TP-Link Kasa, Meross, Amazon Smart Plug
- Wi-Fi Relays: Sonoff Basic, Shelly 1, Aqara Relay
Sensors and Detectors
- Temperature and humidity sensors: Xiaomi Aqara, Eve Room, Sonoff SNZB-02
- Motion sensors: Philips Hue Motion, Ecolink Z-Wave PIR, Aqara Motion Sensor
- Door/window opening sensors: Samsung SmartThings, Aqara Door and Window Sensor, Fibaro Door Sensor
Thermostats and Heating Controllers
- Smart thermostats: Nest Thermostat, Ecobee SmartThermostat, Honeywell T9
- Air conditioning controllers: Sensibo Sky, Ambi Climate, Tado AC Control
Security Cameras
- Surveillance cameras: Arlo, Ring, Reolink, Wyze Cam
- Video intercoms: Google Nest Hello, Eufy Video Doorbell, Ring Doorbell
Security Systems and Alarms
- Alarm systems: SimpliSafe, Abode, Ring Alarm
- Connected sirens: Aeotec Siren, Dome Z-Wave Siren
Voice Assistants
- Amazon Echo (Alexa), Google Nest Hub (Google Assistant), Apple HomePod (Siri)
Speakers and Audio Systems
- Multiroom speakers: Sonos, Bose SoundTouch, Denon Heos
- IR Transmitters/Receivers for TV/Audio Control: BroadLink RM Pro, Logitech Harmony Hub< /li>
IR Controllers/ AC for Air Conditioners and TV
- Infrared Controllers: Broadlink RM Mini, SwitchBot Hub Mini, Sensibo Sky
Connected Gates and Locks
- Smart locks: August Smart Lock, Schlage Encode, Nuki Smart Lock
- Garage controllers: MyQ Chamberlain, Tailwind, Meross Garage Opener
Connected Shutters, Blinds and Curtains
- Smart roller shutters: Somfy, Aqara Roller Shade Controller
- Curtain motors: SwitchBot Curtain, Zemismart
DIY Microcontrollers and Modules
- DIY modules and sensors: ESP8266, ESP32, Raspberry Pi GPIO
- MQTT compatible solutions: NodeMCU, Sonoff with Tasmota or ESPHome firmware
Weather Stations and Environmental Sensors
- Weather stations: Netatmo Weather Station, Ecowitt, Ambient Weather
- Air Quality Sensors: Awair Element, Foobot, Xiaomi PM2.5 Detector
- Electricity Consumption Sensors: Shelly EM, TP-Link HS110, Emporia Vue
- Solar Panels and Inverters: Enphase, SolarEdge, SMA Sunny Boy
- Tesla, BMW Connected, Nissan Leaf
- A sidebar on the left.
- The content of the windows on the right side.
- They are defined as a sequence of actions to be performed.
- They can be triggered manually or by other automations.
- They can accept parameters to customize their behavior.
- They are useful for grouping repetitive or complex actions.
Measurement and Energy Tools
Connected Cars
Home Dashboards and Custom Dashboards
The default Home Assistant dashboard is called “Overview”, which groups together all the devices that have been discovered or added.
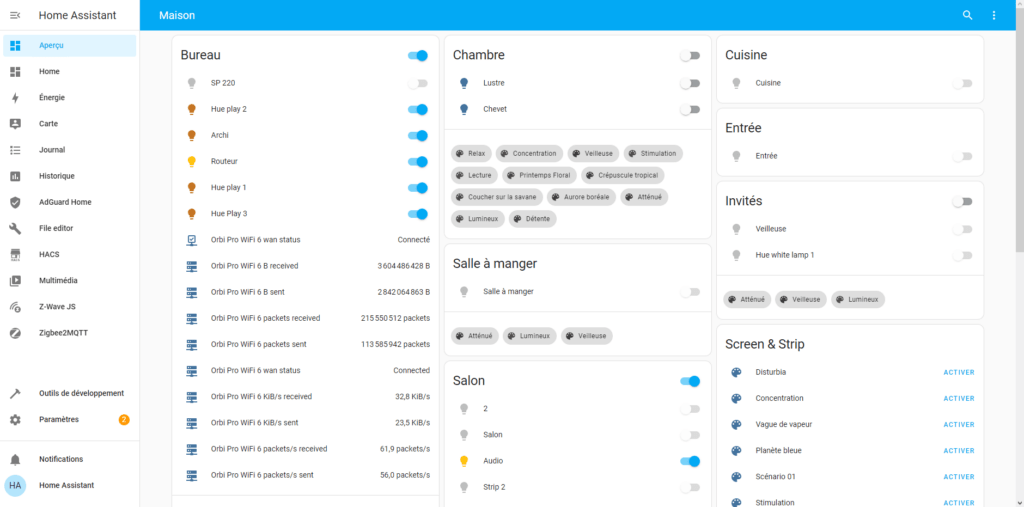
Let’s take a closer look at the Home Assistant interface, which remains consistently organized:
The sidebar displays all the dashboards and the add-ons you want to include in them. When installing an add-on, you will have the option to add a shortcut to it in this sidebar. At the end of the list of dashboards, some handy shortcuts are available, such as the log and history. At the bottom of this bar, you will also find the settings, developer tools, user notifications and profile.
The right side, on the other hand, displays the content of the selected dashboards or pages (such as the settings page, for example). Although we won’t go into detail here on how to create, edit or delete dashboards, you should know that they are fully customizable to suit your needs.
You can create custom dashboards to organize your lighting controls. For example, group controls for conference rooms or reception.
You can set background images, customize your different blocks (“cards”) either via the parameters or directly via YAML coding.
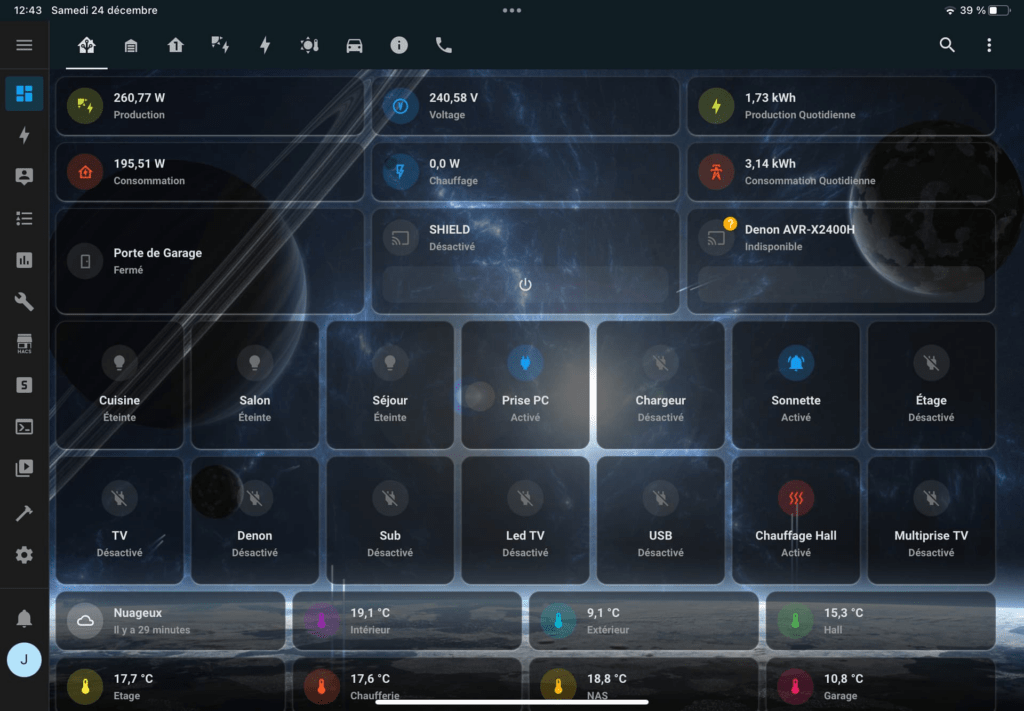
Thanks to the addition of the Mushroom Cards extension, you will be able to access very practical blocks, allowing you to control your lighting devices in a minimum of clicks.

User Management
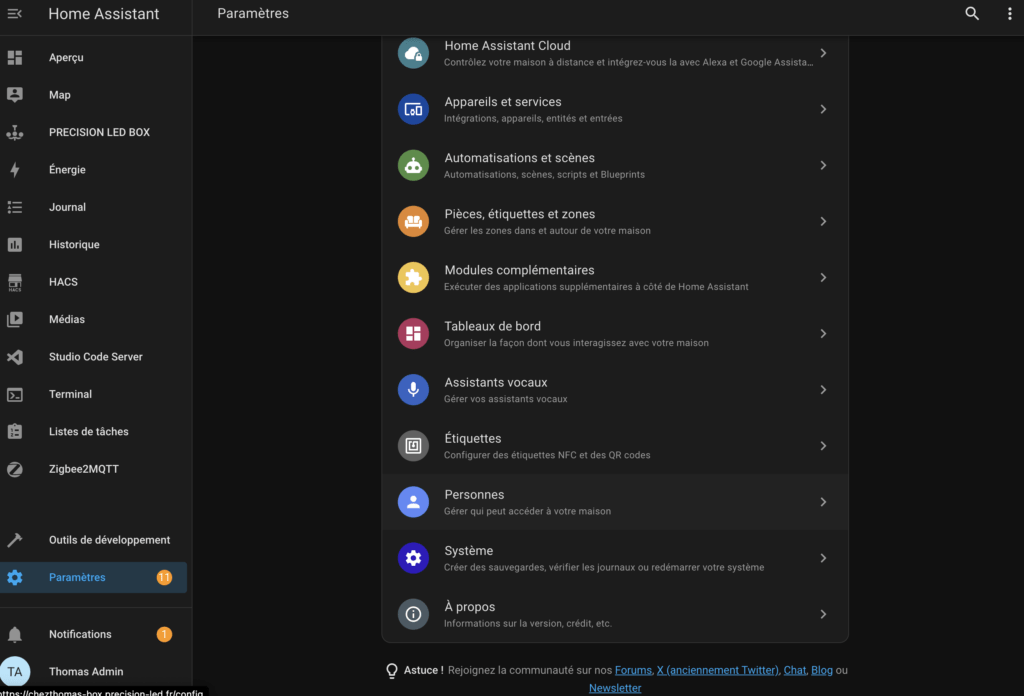
Set up different user accounts with appropriate permissions. For example, give access to outdoor lighting settings only to certain employees.
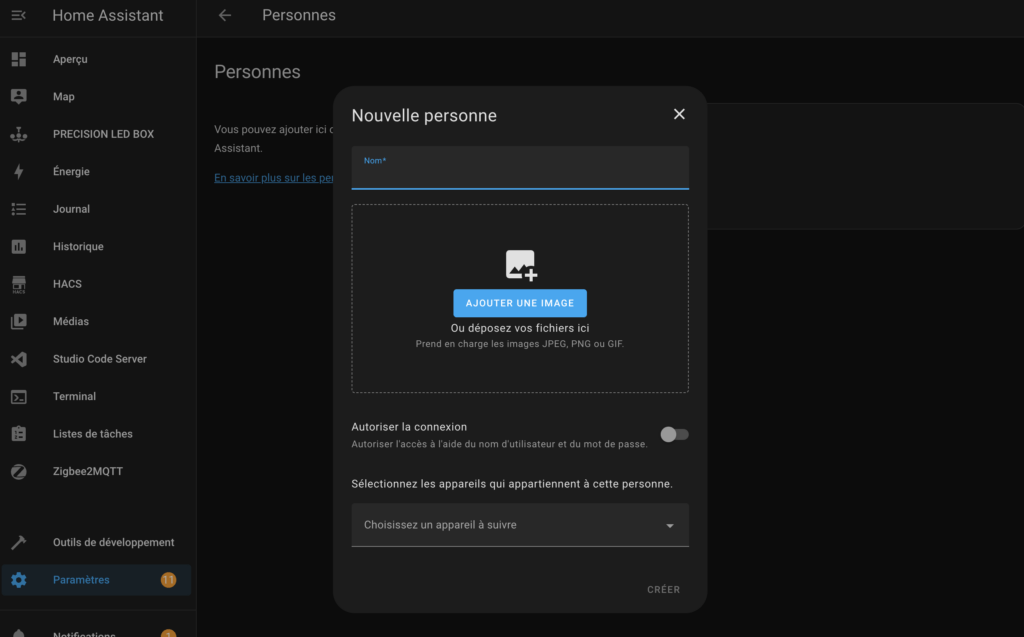
User management is done from the “People” screen in Settings.
These add-ons offer a wide range of features to better manage, customize and secure your Home Assistant installation, according to your needs.
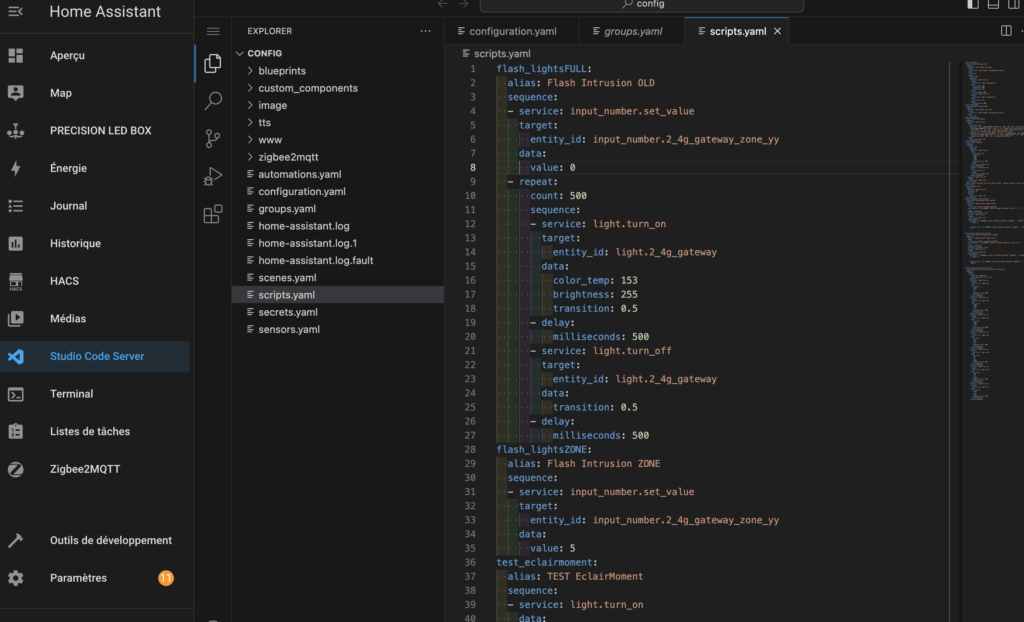
Scripts
A Home Assistant script is a predefined sequence of actions that can be performed on demand or as part of automation. Scripts allow you to group multiple actions into a single, reusable command.
Here are the main features of Home Assistant scripts:
You can create your scripts with a visual editor, as in the example below.
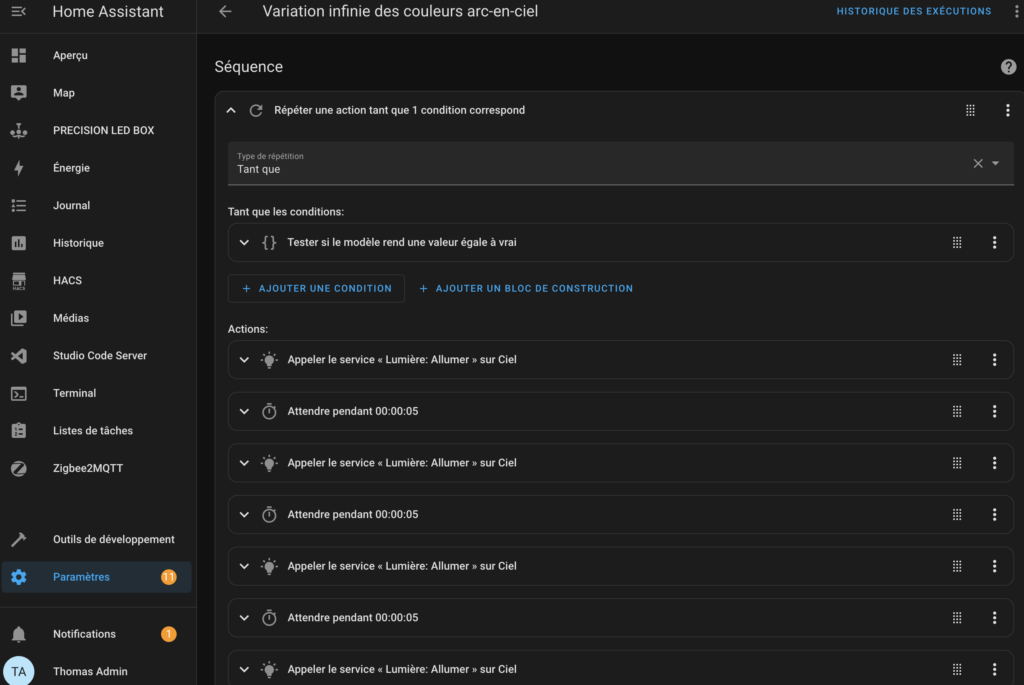
You can also code your scripts. Here are two examples of scripts coded in YAML:
Automatic morning lighting:
 - alias: "Morning turn on"
 trigger:
 - platform: time
 at: "08:00:00"
 action:
 - service: light.turn_on
 target:
 entity_id: group.office_lights
 data:
 brightness: 80
Lighting based on presence detection:
- alias: "Lighting on detection"
 trigger:
 - platform: state
 entity_id: binary_sensor.office_motion
 to: 'on'
 action:
 - service: light.turn_on
 target:
 entity_id: group.office_lights
 data:
 brightness: 100
Feel free to use generative AI tools to create your scripts! ChatGPT does this very well.
Automations
A Home Assistant automation, on the other hand, is a set of rules that automatically trigger actions based on specific conditions. It usually consists of three parts:
- Trigger: The event that initiates the automation.
- Condition (optional): Additional criteria that must be met.
- Action: The tasks to execute when the trigger is activated and the conditions are met. An action can be a script.
Lighting-based automation example:
textalias: "Automatic living room lighting"
trigger:
- platform: state
entity_id: binary_sensor.living_room_movement
to: 'on'
condition:
- condition: numeric_state
entity_id: sensor.living_room_luminosity
below: 50
action:
- service: light.turn_on
target:
entity_id: light.living_room_principal
data:
brightness: 180
- wait_for_trigger:
- platform: state
entity_id: binary_sensor.salon_mouvement
to: 'off'
for:
minutes: 5
- service: light.turn_off
target:
entity_id: light.salon_principal
This automation:
- Triggers when motion is detected in the living room.
- Checks if the brightness is below 50 lux.
- If the conditions are met, turns on the main living room light at 70% brightness.
- Waits until the motion sensor has not detected any movement for 5 minutes.
- Turns off the light after this time has elapsed.
This automation illustrates how Home Assistant can intelligently manage lighting based on movement and ambient brightness, providing comfort and energy savings.
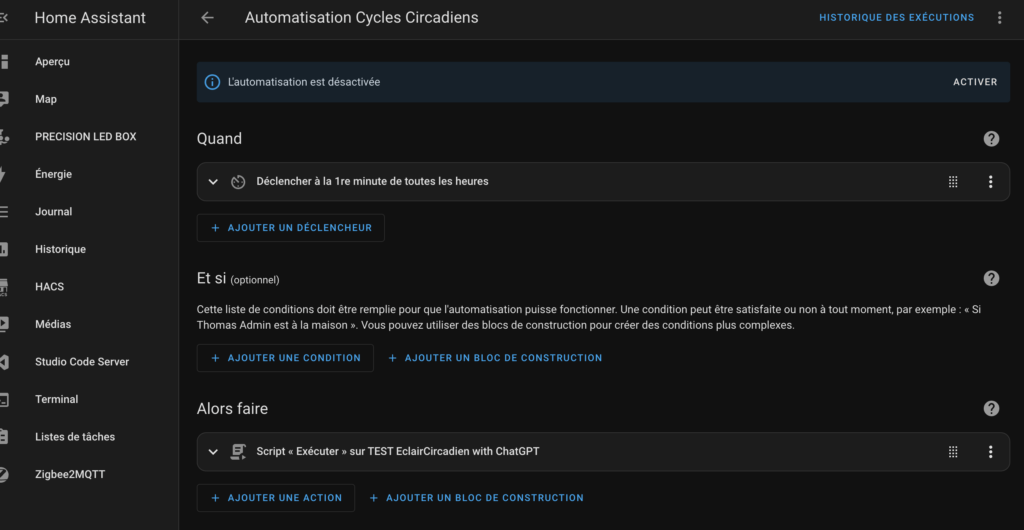
Here is an example of an automation, which will trigger a script every hour:
Securing remote access
Remote access to your Home Assistant system requires special attention in terms of security. Using Cloudflare in combination with a secure domain name provides a robust solution to protect your installation.
Configuration with Cloudflare
Cloudflare acts as a middleman between your Home Assistant server and the internet, providing several security benefits:
- Protection against DDoS attacks
- Hiding your server’s real IP address
- Encrypting traffic between the client and Cloudflare
To set up Cloudflare :
- Create a Cloudflare account and add your domain
- Change your domain’s DNS servers to point to Cloudflare’s
- Enable “Full (strict)” mode in Cloudflare’s SSL/TLS settings
Using a domain name secure
A custom domain name (e.g. myhome.mydomain.com) improves security and usability:
- It avoids the use of exposed IP addresses
- Allows the implementation of SSL certificates for HTTPS encryption
Cloudflare Zero Trust Option
This advanced feature significantly enhances security:
- Multi-factor authentication for access to your Home Assistant instance
- Granular access control based on user identity
- End-to-end encryption between the client and your Home Assistant server
To enable Zero Trust:
- Sign up for Cloudflare’s Zero Trust service
- Set up an app in the Zero Trust dashboard
- Set up specific access policies for your Home Assistant instance
Benefits of this setup
- Enhanced Security: Protection against common web threats
- Enhanced Privacy: Encryption of data in transit
- Flexible Access: Precise control over who can access your system and when
By implementing these measures, you create a strong layer of security around your Home Assistant system, allowing safe and reliable remote access to your home automation setup.
You can check out this explanatory video, from the excellent Homation YouTube channel:
Add-ons
To extend the capabilities of Home Assistant, add-ons are essential: they allow to add features not provided natively, thus enriching the possibilities of customization and management of your home automation system.
These are accessible from Settings / Add-ons. You will be able to see which ones are already installed, and access the “Shop” of add-ons.
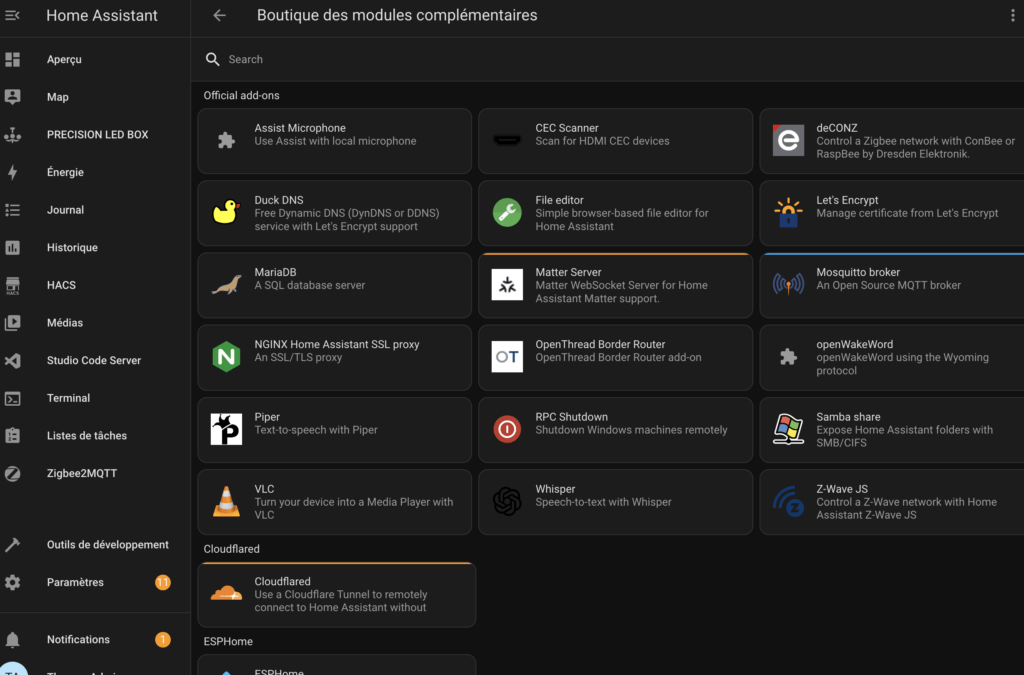
For example, if you need to code in Home Assistant, you can add Studio Code Server (a file editor), or Terminal to run commands online.
Here are some additional examples of useful plugins to enrich and personalize your experience with Home Assistant:
- Node-RED: A powerful visual automation tool that allows you to create complex automation flows with drag-and-drop features. Ideal for those who want a visual approach to setting up advanced automation scenarios.
- Mosquitto MQTT Broker: Essential for managing communication between devices using the MQTT protocol, such as sensors or lighting systems. This plugin allows you to centralize messages from your IoT devices in Home Assistant.
- ESPHome: Perfect for users of ESP8266 or ESP32 microcontrollers, this add-on allows you to easily program and manage your ESP devices, in order to integrate them into Home Assistant without having to manually code.
- Grafana & InfluxDB: A powerful plugin duo to collect and visualize data from your connected home, such as temperature or energy consumption history, in the form of detailed and interactive graphs.
- Home Assistant Google Drive Backup: To automate backups of your Home Assistant configuration on Google Drive. A must to avoid losing valuable data in the event of a failure or unforeseen update.
- Deconz: An alternative for those who use the Zigbee protocol. This plugin is useful for managing and integrating Zigbee devices like Philips Hue bulbs or Xiaomi sensors directly from Home Assistant.
- Let’s Encrypt: This plugin is essential for those who want to secure their access to Home Assistant from outside by installing a free SSL certificate. It works well with other add-ons like DuckDNS to manage dynamic domain names.
PRECISION LED has designed the PRECISION LED BOX: a fully customizable home automation box compatible with most connected equipment (lighting, security, openings, etc.). It is based on a Raspberry Pi and Home Assistant.
This is a completely tailor-made product, which we adapt to your needs and your equipment. We also offer training so that you can become autonomous in the use of this equipment, which will save you a lot of time!
Do not hesitate to contact us for more information!


